
An electric sandwich maker makes meal prep fast and fun. It’s a favorite in modern kitchens for creating quick, delicious snacks. Over 65% of people now prefer appliances that let them cook healthier meals. With its energy-efficient design and ingredient control, this tool fits perfectly into today’s busy, health-conscious lifestyle.
Key Takeaways
- Learn about your sandwich maker’s parts, like plates and lights, to use it safely and well.
- Preheat the sandwich maker and grease the plates lightly for crispy, tasty sandwiches.
- Try fun recipes like mini pizzas or desserts to use your sandwich maker in new ways.
Getting Started with Your Electric Sandwich Maker
Understanding the Components of the Appliance
Before diving into sandwich-making, it’s important to familiarize yourself with the parts of your electric sandwich maker. Most models include two nonstick heating plates, a locking latch, and indicator lights. The nonstick plates ensure easy cleaning and healthier cooking by reducing the need for excess oil. The locking latch keeps the appliance securely closed while in use, preventing spills or uneven cooking. Indicator lights, typically red and green, signal when the appliance is powered on and preheated. Compact designs are especially popular in urban areas where space is limited, making these appliances a favorite for students and busy professionals.
Preparing the Sandwich Maker for First Use
Proper preparation ensures your electric sandwich maker works efficiently from the start. Follow these steps:
- Plug in the appliance and let it heat up until the indicator light signals readiness.
- Wipe the plates with a damp cloth to remove any residue from manufacturing.
- Lightly grease the plates with a small amount of oil or butter to prevent sticking.
- Test the appliance by running it empty for a few minutes. This helps burn off any odors or coatings from production.
These steps not only improve performance but also extend the lifespan of your sandwich maker.
Preheating and Greasing the Plates for Best Results
Preheating is a crucial step for achieving evenly cooked sandwiches. Turn on the sandwich maker and wait for the green light to indicate it’s ready. While preheating, apply a thin layer of oil or butter to the plates. This prevents sticking and adds a golden, crispy texture to your sandwiches. Health-conscious users often prefer nonstick models, which require minimal greasing and support healthier cooking habits.
Step-by-Step Guide to Using an Electric Sandwich Maker

Assembling and Preparing Your Sandwich
Creating a delicious sandwich starts with thoughtful preparation. Follow these steps to assemble your sandwich like a pro:
- Spread your favorite sauce evenly on one side of each bread slice. Popular choices include mayonnaise, pizza sauce, or ketchup.
- Add your preferred fillings, such as boiled or fried meat, fresh veggies, or a combination of both. Balance the ingredients to avoid overloading the sandwich.
- Sprinkle a pinch of salt or your favorite seasoning to enhance the flavor.
- Place the second slice of bread on top, with the sauce side facing the fillings.
Pro Tip: For an extra cheesy treat, add a slice of cheese or shredded cheese between the layers. It melts beautifully in the electric sandwich maker, creating a gooey, satisfying bite.
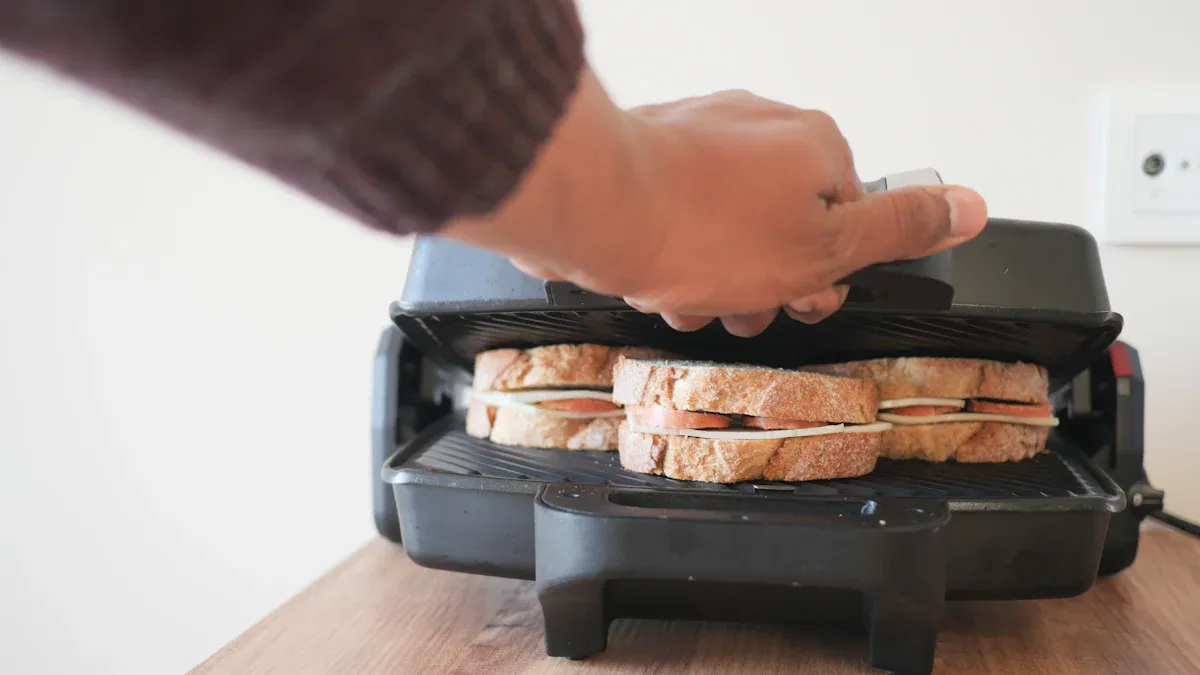
Placing the Sandwich in the Maker Safely
Once your sandwich is ready, it’s time to transfer it to the electric sandwich maker. Safety and precision are key here:
- Ensure the sandwich maker is preheated and the indicator light shows it’s ready.
- Open the lid carefully to avoid touching the hot plates.
- Place the sandwich gently on the bottom plate, ensuring it’s centered for even cooking.
- Close the lid slowly, using the locking latch to secure it in place.
Safety Reminder: Always use oven mitts or a kitchen towel when handling the hot appliance. Avoid pressing down too hard on the lid, as this can cause the fillings to spill out.
Cooking, Monitoring, and Removing the Sandwich
Cooking your sandwich to perfection requires attention and timing. Here’s how to do it:
- Allow the sandwich to cook for 3-5 minutes, depending on the thickness of the bread and fillings. Most electric sandwich makers will have an indicator light to signal when the sandwich is ready.
- Avoid opening the lid too early, as this can disrupt the cooking process. Instead, rely on the indicator light or a timer.
- Once done, unplug the appliance and carefully open the lid. Use a wooden or silicone spatula to remove the sandwich, as metal utensils can damage the nonstick coating.
Note: Let the sandwich cool for a minute before serving. This prevents burns and allows the flavors to settle.
With these steps, you’ll achieve perfectly toasted sandwiches every time. Whether you’re making a classic grilled cheese or experimenting with gourmet fillings, your electric sandwich maker will deliver consistent results.
Pro Tips and Creative Uses for Your Electric Sandwich Maker
Tips for Perfectly Crispy and Evenly Cooked Sandwiches
Achieving that golden, crispy perfection in your sandwiches doesn’t have to be a mystery. With a few simple tricks, anyone can elevate their sandwich-making game:
- Preheat for Success: Always preheat your electric sandwich maker before placing the sandwich inside. This ensures the bread cooks evenly and develops a satisfying crunch.
- Don’t Overload the Fillings: While it’s tempting to pack your sandwich with all your favorite ingredients, too much filling can lead to uneven cooking. Stick to a balanced amount for the best results.
- Use the Right Bread: Opt for bread that’s not too thick or too thin. Sourdough, whole wheat, or even brioche work well. Thin bread may burn quickly, while thick slices might not cook through.
- Spread Butter or Oil Evenly: A light coating of butter or oil on the outer sides of the bread helps achieve that golden-brown finish. For a healthier option, use a cooking spray or skip this step if your sandwich maker has nonstick plates.
- Monitor the Cooking Time: Most sandwiches cook perfectly in 3-5 minutes. Keep an eye on the indicator light or set a timer to avoid overcooking.
Pro Tip: For an extra crispy texture, sprinkle a tiny bit of grated cheese on the outside of the bread before placing it in the sandwich maker. The cheese will melt and form a delicious crust.
Creative Recipes Beyond Sandwiches (Mini Pizzas, Omelets, Desserts)
Your electric sandwich maker isn’t just for sandwiches—it’s a versatile tool that can inspire culinary creativity. Here are some fun and unexpected ways to use it:
- Mini Pizzas: Transform your sandwich maker into a mini pizza oven. Place a tortilla or flatbread on the plate, spread pizza sauce, and add toppings like cheese, pepperoni, or veggies. Close the lid and cook for 3-4 minutes. The result? A crispy, cheesy treat perfect for a quick snack.
- Omelets: Skip the stovetop and make fluffy omelets in your sandwich maker. Beat eggs with your favorite mix-ins like diced veggies, cheese, or cooked bacon. Pour the mixture directly onto the preheated plates and cook until set. It’s a mess-free way to enjoy breakfast.
- Desserts: Satisfy your sweet tooth with easy desserts. Try placing a slice of bread with Nutella or peanut butter and banana slices in the sandwich maker. For a more indulgent treat, use puff pastry filled with chocolate or fruit jam.
Fun Fact: Electric sandwich makers are compact and easy to clean, making them ideal for experimenting with recipes. Many models even have dishwasher-safe plates, so cleanup is a breeze.
These creative uses highlight the versatility of the electric sandwich maker. Whether you’re whipping up a quick breakfast, a savory snack, or a sweet dessert, this appliance makes it easy to explore new recipes and flavors.
Cleaning, Maintenance, and Safety Tips
Cleaning the Plates and Removing Residue
Keeping your electric sandwich maker clean ensures it works efficiently and lasts longer. Follow these simple steps to clean it like a pro:
- Unplug the appliance and let it cool slightly. Cleaning while it’s still warm makes removing residue easier.
- Use a damp, soft cloth or sponge to wipe the nonstick plates. Avoid abrasive materials that could damage the coating.
- Wipe the outer surface with a damp cloth to remove grease or fingerprints.
- Dry everything thoroughly with a clean cloth to prevent moisture buildup.
For stubborn stains, try these natural cleaning solutions:
- Mix baking soda with water to create a paste. Apply it to the plates, let it sit for a few minutes, and wipe it off.
- Use a vinegar and water solution to clean the plates and eliminate odors.
- Lemon juice works as a natural deodorizer and leaves a fresh scent.
Tip: Never submerge the appliance in water or use metal utensils on the plates. This protects the nonstick surface and electrical components.
Proper Storage to Maintain Longevity
Storing your electric sandwich maker correctly can extend its lifespan. Once it’s clean and dry, follow these tips:
- Wrap the cord neatly to prevent tangling or damage.
- Store the appliance in an upright position if space allows. This saves room and protects the plates from scratches.
- Keep it in a cool, dry place away from moisture or heat sources.
Pro Tip: If your sandwich maker has removable plates, store them separately to avoid unnecessary pressure on the hinges.
Key Safety Precautions for Safe Operation
Using your electric sandwich maker safely is just as important as cleaning it. Here are some essential safety tips:
- Always place the appliance on a flat, heat-resistant surface.
- Avoid touching the hot plates or lid during use. Use oven mitts if needed.
- Never leave the sandwich maker unattended while it’s on.
- Keep the cord away from water or hot surfaces to prevent accidents.
- Allow the appliance to cool completely before cleaning or storing it.
Reminder: Regularly inspect the cord and plug for damage. If you notice any issues, stop using the appliance and consult a professional.
By following these cleaning, storage, and safety tips, you’ll keep your electric sandwich maker in top condition and enjoy hassle-free cooking for years to come.
Using an electric sandwich maker opens up endless possibilities for quick and tasty meals. Preparation makes the process smooth, while creativity keeps it exciting. Proper care ensures the appliance lasts for years.
Tip: Experiment with new recipes and ingredients to keep things fresh. Always clean and store the sandwich maker carefully for safe and reliable use.
With these tips, anyone can master the art of sandwich-making and enjoy delicious results every time.
FAQ
How do I know when my sandwich is ready?
Most sandwich makers have a green indicator light. When it turns on, your sandwich is cooked. You can also check by timing it for 3-5 minutes.
Can I use frozen bread or fillings?
Yes, but thawing them first ensures even cooking. Frozen items may take longer and could affect the texture of your sandwich.
What should I do if my sandwich sticks to the plates?
Apply a thin layer of oil or butter before cooking. If it sticks, let the appliance cool and gently remove residue with a damp cloth.