Every bite of a perfectly crisp sandwich starts with the right technique. He can transform any simple meal by using an Electric Non-stick Sandwich Maker. She relies on practical methods to achieve that golden, crunchy texture every time.
Key Takeaways
- Choose thick, dense breads like sourdough or ciabatta to get a crispy, golden crust that holds up well during cooking.
- Always preheat your electric non-stick sandwich maker fully before cooking to ensure even browning and a crunchy texture.
- Apply a thin, even layer of butter on the bread to create a crisp crust and keep fillings inside, avoiding soggy or messy sandwiches.
Choosing the Right Bread for Your Electric Non-stick Sandwich Maker
Best Bread Types for Crispiness
Selecting the right bread forms the foundation of a crispy sandwich. He should consider thickness, density, and structure when choosing bread for an electric non-stick sandwich maker. Certain types consistently deliver superior results:
- Thicker breads such as sourdough and ciabatta withstand heat and pressure well.
- These breads develop a crispy exterior without turning soggy.
- Deep wells in many sandwich makers accommodate chunky fillings and thick slices.
- Non-stick plates prevent crumbs from sticking, making cleanup easier.
A quick comparison of bread types and their crispiness results can guide the selection process:
| Bread Type | Crispiness Result | Cooking Time (approx.) | Notes |
|---|---|---|---|
| Cheese Toastie | Evenly browned and crisp | ~6-7 minutes | Fillings melted; some uneven browning noted |
| Deep Filled Toastie | Evenly browned and crisp | ~6-7 minutes | Tightly sealed sandwiches |
| Paninis | Super crisp, perfectly melted fillings | ~5 minutes | Large surface area; grill lines defined |
| Waffles | Often undercooked or unevenly browned | Up to 14 minutes | Inconsistent temperature; not recommended |
Why Bread Texture Makes a Difference
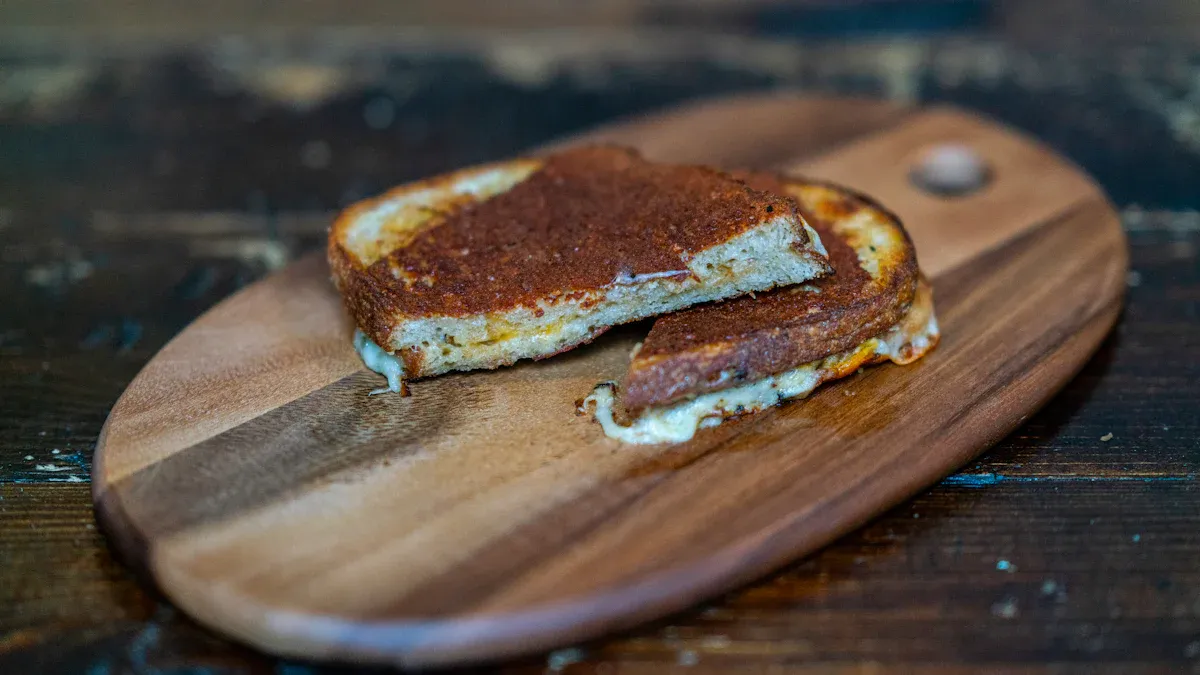
Bread texture directly impacts the final crunch. She finds that dense, chewy breads like ciabatta and sourdough resist moisture from fillings, maintaining structure during cooking. Lighter breads, such as standard white sandwich loaves, may brown but often lack the robust crunch and can become soggy. The electric non-stick sandwich maker’s thermostat ensures even cooking, but the bread’s texture determines how well it crisps. For best results, he should select bread with a firm crust and a tight crumb, ensuring a golden, crunchy bite every time.
Preheating Your Electric Non-stick Sandwich Maker
The Impact of Preheating on Crispiness
Preheating plays a crucial role in achieving a crispy sandwich. When he preheats the electric non-stick sandwich maker, the plates reach an even temperature before the bread touches the surface. This immediate heat contact creates a rapid Maillard reaction, which browns the bread and locks in moisture. She notices that sandwiches placed on a cold surface often turn out pale and limp. The crust fails to develop a satisfying crunch, and the fillings may leak into the bread, causing sogginess.
Tip: Always allow the appliance to reach full temperature before adding the sandwich. This step ensures a golden, crispy finish every time.
Simple Steps to Preheat Properly
He can follow a few straightforward steps to preheat the electric non-stick sandwich maker effectively:
- Plug in the appliance and close the lid.
- Set the temperature dial, if available, to the desired setting.
- Wait for the indicator light to signal readiness. Most models feature a green or orange light.
- For best results, let the plates heat for an extra minute after the light turns on.
She should avoid rushing this process. Proper preheating guarantees even cooking and prevents sticking. Consistent preheating also extends the lifespan of the non-stick coating by reducing the risk of burnt-on residue.
Butter or Oil: Getting the Perfect Crunch in Your Electric Non-stick Sandwich Maker

Evenly Coating Bread for Maximum Crunch
He achieves the best crunch by applying a thin, even layer of fat to the bread before placing it in the Electric Non-stick Sandwich Maker. This step creates a barrier that helps the bread brown evenly and develop a crisp exterior. The Serious Eats Mozzarella in Carrozza recipe demonstrates that a single, even coating of fat—such as butter or mayonnaise—produces a golden, crisp crust without making the sandwich too hard. The recipe also highlights that this layer acts as a glue, keeping the sandwich together during cooking and preventing fillings from spilling out.
Tip: Use a pastry brush or the back of a spoon to spread butter or oil evenly across the entire surface of the bread. This technique ensures every bite delivers the same satisfying crunch.
Butter vs. Oil: Which Works Best?
She often faces the choice between butter and oil when preparing sandwiches. Cooking tests reveal that butter creates a slightly adhesive surface, which helps hold the sandwich together and prevents fillings from escaping. However, butter does not always add extra crunch to the sandwich. Olive oil, on the other hand, can cause fillings to slip out and does not provide the same crisp texture. The Washington Post notes that buttered bread cooked in a pan yields a crunchier texture than bread cooked in olive oil. For those seeking a classic, crunchy finish, butter remains the preferred option in most kitchens.
A quick comparison:
- Butter: Adds flavor, helps with cohesion, delivers a crunchier texture.
- Oil: Easier to spread, but may result in less crunch and poor sandwich structure.
He finds that using butter in the Electric Non-stick Sandwich Maker consistently produces the best results for both texture and taste.
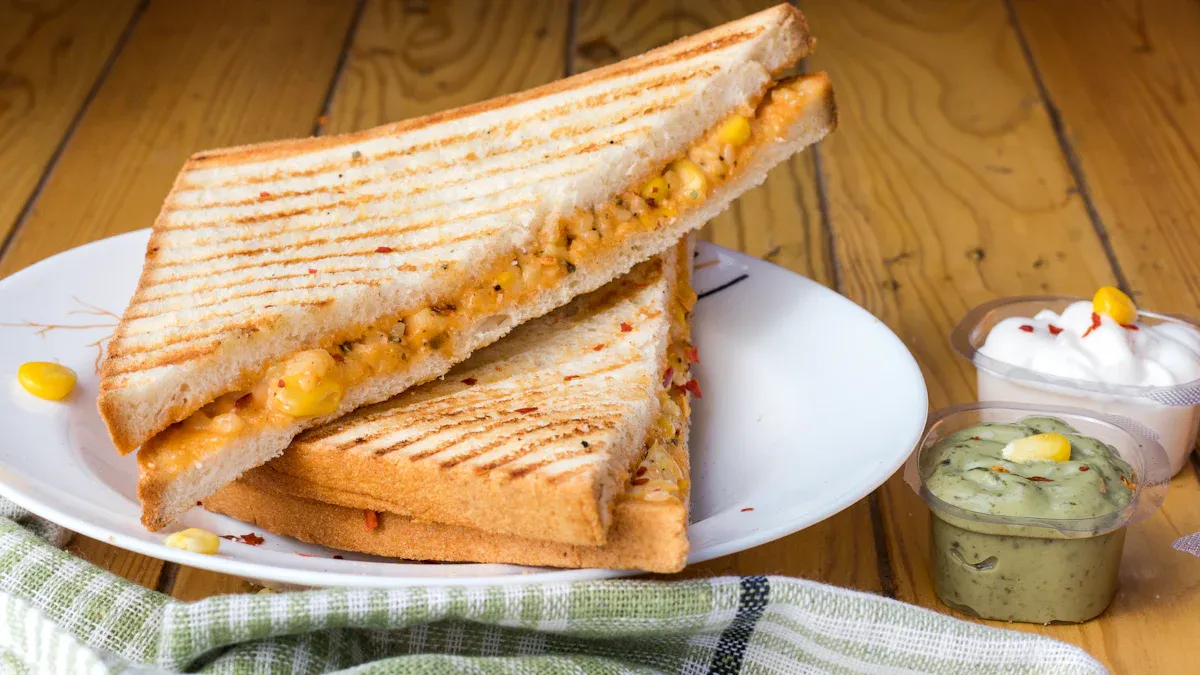
Avoid Overfilling in Your Electric Non-stick Sandwich Maker
How Much Filling is Just Right?
He often wonders how much filling creates the perfect sandwich. The answer lies in moderation. A generous layer of cheese, meats, or vegetables adds flavor, but too much can overwhelm the bread. She recommends spreading fillings evenly, leaving a small border—about half an inch—around the edges. This space allows the bread to seal properly during cooking. When he piles on too many ingredients, the sandwich may not close, and the contents can spill out. A balanced approach ensures each bite contains both crispy bread and delicious filling.
Tip: For best results, use about 2-3 tablespoons of filling per sandwich. Adjust based on bread thickness and the type of ingredients.
Preventing Soggy or Messy Sandwiches
She notices that overfilled sandwiches often lead to soggy or messy outcomes. When the sandwich contains too much filling, the edges struggle to seal. This improper sealing causes the filling to leak out during cooking. As a result, the bread absorbs excess moisture, and the sandwich loses its crisp texture. He finds that a moderate amount of filling keeps the sandwich neat and maintains the desired crunch. To further prevent sogginess, he avoids wet ingredients like tomatoes or sauces near the edges. Instead, he places them in the center, surrounded by drier ingredients such as cheese or cooked meats.
A well-portioned sandwich not only tastes better but also looks more appealing. By following these guidelines, she consistently achieves sandwiches that are both crisp and clean.
Timing Your Sandwiches in the Electric Non-stick Sandwich Maker
Finding the Ideal Cook Time
He understands that timing plays a crucial role in achieving a perfectly crisp sandwich. Most experts recommend grilling the sandwich for about three to five minutes. This window allows the bread to develop a golden brown crust while the cheese inside melts smoothly. She always preheats the appliance before placing the sandwich on the bottom plate. By closing the lid gently and applying slight pressure, she ensures even contact with the heating surface. He avoids opening the press too often during cooking, as this can disrupt the process and extend the total grilling time. Instead, he relies on the aroma and the gradual color change of the bread as indicators of progress.
Tip: Set a timer for four minutes on the first attempt. Adjust the time by thirty-second intervals in future batches to match personal preferences for crispiness.
Checking for Perfect Doneness
She checks for doneness by observing both the color and texture of the bread. A perfectly cooked sandwich displays a deep golden hue and feels crisp to the touch. He lifts the lid carefully after the recommended time, looking for melted cheese and evenly browned surfaces. If the sandwich appears pale or the cheese remains solid, he closes the lid and continues grilling in short increments. She finds that patience leads to consistent results. By following these steps, he achieves sandwiches that are crisp on the outside and warm, gooey on the inside.
Bonus Tips and Troubleshooting for Electric Non-stick Sandwich Maker Success
Preventing Sticking and Easy Release
He often finds that even non-stick surfaces can sometimes cause sandwiches to stick. She recommends applying a thin layer of butter or oil to the outside of the bread before grilling. This step helps the sandwich release easily after cooking. He also checks that the plates are clean and free from leftover crumbs or cheese. A clean surface prevents residue from burning and sticking to the next sandwich.
Tip: Wait a minute after cooking before lifting the lid. The steam will settle, and the sandwich will come off more easily.
She uses a silicone spatula to lift sandwiches gently. Metal utensils can scratch the non-stick coating and reduce its effectiveness over time.
Fixing Uneven Browning
He notices that some sandwiches brown unevenly. She solves this by spreading the butter or oil evenly across the bread. Uneven coating can cause light and dark spots. He also rotates the sandwich halfway through cooking if the appliance allows it. This method ensures both sides receive equal heat.
- Use bread slices of similar thickness for consistent results.
- Avoid overfilling, as thick fillings can prevent the plates from closing evenly.
For best results, always preheat the appliance fully. Consistent temperature leads to uniform browning and a crisp finish.
He can master crispy sandwiches by following these five secrets. She should try different breads, fillings, and methods with the Electric Non-stick Sandwich Maker. Readers can share their own sandwich-making secrets or experiences in the comments. Every experiment brings new flavors and textures to the table.
FAQ
Can he use gluten-free bread in an electric non-stick sandwich maker?
Yes, he can use gluten-free bread. It may require a shorter cook time. Gluten-free bread often browns faster and can become crisp quickly.
What should she do if the sandwich sticks to the plates?
She should let the sandwich cool for one minute. Use a silicone spatula to lift it gently. This method protects the non-stick coating.
Does he need to clean the sandwich maker after every use?
Cleaning after each use prevents residue buildup. He should wipe the plates with a damp cloth once the appliance cools. This habit keeps the sandwich maker in top condition.