Ever wondered how restaurants achieve that perfect sear on steaks or those golden grill marks on paninis? A contact grill press makes it possible to replicate that magic at home. Its design cooks food from both sides simultaneously, cutting cooking time in half while locking in flavors. The intense heat creates beautifully browned exteriors on meats and vegetables, enhancing their taste through the Maillard reaction. Whether it’s juicy hot dogs, crispy chicken, or a quick grilled sandwich, this tool delivers professional results with ease.
Key Takeaways
- A contact grill press cooks food from both sides, reducing cooking time and enhancing flavor. This tool is perfect for busy weeknights.
- Preheating the grill is essential for achieving even cooking and those desirable grill marks. Always allow 5-10 minutes for the grill to heat up before use.
- Proper cleaning and maintenance extend the life of your grill press. Clean after each use and store it in a cool, dry place to keep it in top shape.
Understanding the Contact Grill Press
Features and Types
Contact grill presses come in a variety of designs, each tailored to specific cooking needs. Popular types include Panini presses, griddles, and indoor grills. Panini presses are ideal for sandwiches, offering ridged plates that create those signature grill marks. Griddles, on the other hand, feature flat surfaces perfect for pancakes, eggs, or bacon. Indoor grills combine the best of both worlds, allowing users to cook everything from steaks to vegetables with ease.
The market also caters to different budgets and preferences. Budget-friendly models provide basic functionality, while mid-range options often include adjustable temperature controls. Premium models may feature non-stick surfaces, removable plates, and even smart technology for precise cooking. Whether for residential or commercial use, there’s a contact grill press to suit every kitchen.
Advantages for Home Cooking
A contact grill press offers several advantages that elevate home cooking. First, it provides concentrated heat, which speeds up cooking times. Unlike conventional grills, it cooks food from both sides simultaneously, ensuring even results. This makes it perfect for busy weeknights when time is limited.
Another benefit is its compact size. While conventional grills require more space, a contact grill press fits neatly on a countertop. It’s also versatile, handling everything from searing meats to grilling vegetables. However, users should note that the pressing lid can sometimes squeeze out juices from meats, so careful doneness control is essential.
For those seeking restaurant-quality meals at home, this tool is a game-changer. Its ability to deliver consistent results with minimal effort makes it a must-have for any kitchen.
Preparation for Optimal Results
Preheating Tips
Preheating a contact grill press is a crucial step for achieving consistent and professional-quality results. It ensures the cooking surface reaches the right temperature before food touches it, which helps with even cooking and better searing. Skipping this step can lead to unevenly cooked food or a lack of those signature grill marks.
To preheat effectively:
- Plug in the grill and set it to the desired temperature. Many models have indicator lights that signal when the grill is ready.
- Allow the grill to heat for 5-10 minutes. This time may vary depending on the model, so always refer to the user manual.
- Test the heat by sprinkling a few drops of water on the surface. If they sizzle and evaporate quickly, the grill is ready to use.
Tip: Preheating not only improves cooking results but also helps prevent food from sticking to the plates.
Cleaning and Seasoning
Proper cleaning and seasoning of your contact grill press can extend its lifespan and improve its performance. Cleaning after every use prevents food residue from building up, while seasoning helps maintain non-stick surfaces and enhances flavor.
Here’s how to clean your grill:
- After Use: While the grill is still warm (but not hot), wipe the plates with a damp cloth or sponge. For stubborn residue, use a soft-bristle brush or a non-abrasive scraper.
- Deep Cleaning: If the plates are removable, soak them in warm, soapy water. Avoid harsh detergents or steel wool, as these can damage the surface.
Seasoning is equally important, especially for grills with cast iron plates. Lightly coat the plates with a thin layer of cooking oil after cleaning. This prevents rust and keeps the surface smooth for future use.
Note: Always unplug the grill before cleaning and ensure it’s completely dry before storing.
Food Preparation Techniques
The way food is prepared before it hits the grill can make a big difference in the final result. Simple adjustments can elevate your dishes from good to great.
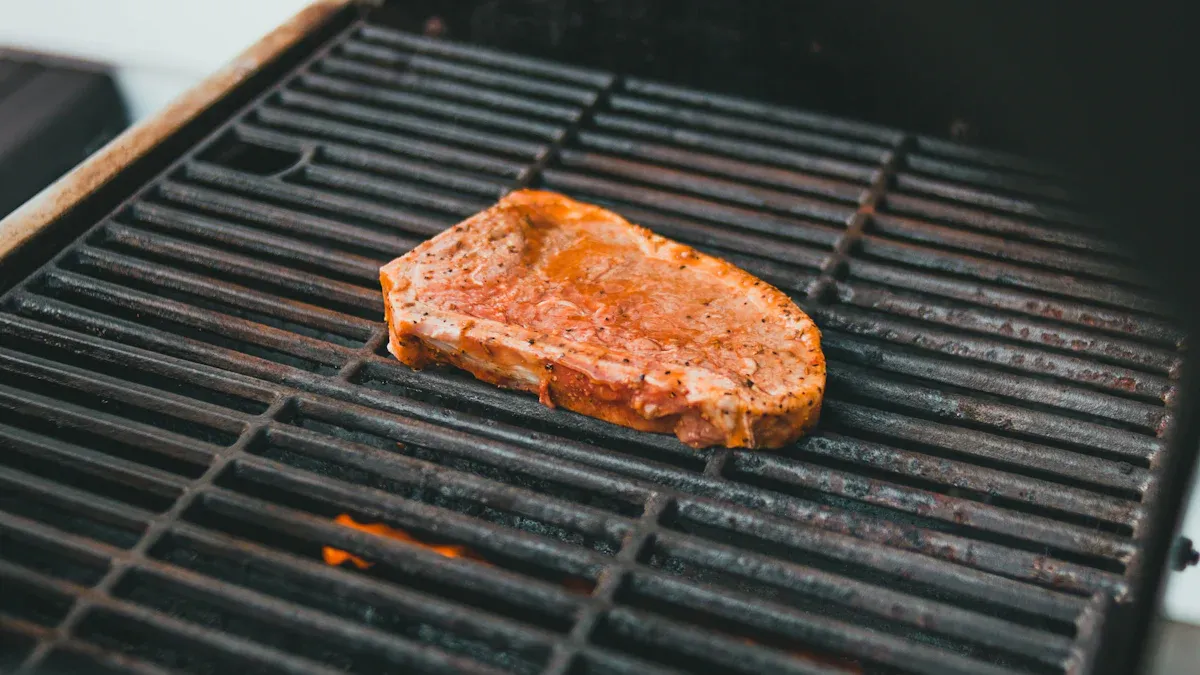
- Meats: Pat meats dry with a paper towel to remove excess moisture. This helps achieve a better sear. For even cooking, pound thicker cuts to a uniform thickness.
- Vegetables: Slice vegetables into even pieces to ensure they cook at the same rate. Lightly coat them with oil to prevent sticking and enhance flavor.
- Sandwiches: For paninis or grilled sandwiches, butter the outer sides of the bread. This creates a crispy, golden crust while keeping the inside soft and melty.
Pro Tip: Marinate meats or season vegetables at least 30 minutes before grilling. This allows flavors to penetrate and enhances the taste of your dish.
By following these preparation steps, anyone can maximize the potential of their contact grill press and create meals that rival restaurant-quality dishes.
Cooking Techniques with a Contact Grill Press
Step-by-Step Instructions
Cooking with a contact grill press is straightforward, but following a few key steps ensures the best results every time.
- Prepare the Grill: Check the grill’s plates for cleanliness and ensure it’s plugged in securely. If using a gas-powered grill, check the fuel level and light it with the lid open to avoid gas buildup.
- Preheat the Grill: Set the temperature to your desired level and allow the grill to heat for about 10-15 minutes. For charcoal grilling, ignite the coals and wait until they’re covered with gray ash before placing the cooking grate.
- Clean the Cooking Surface: Use a grill brush to remove any residue from previous use. Lightly oil the plates with a paper towel dipped in vegetable oil to prevent sticking.
- Prepare Your Food: Season meats and vegetables, ensuring they’re evenly sliced or pounded to uniform thickness. Butter the outer sides of bread for sandwiches to achieve a crispy crust.
- Grill and Monitor: Place the food on the grill and close the lid gently. Monitor the cooking process to avoid overcooking or squeezing out juices.
Tip: Always preheat the grill to maximize browning and searing. This step is crucial for achieving restaurant-quality results.
Tips for Perfect Searing and Grilling
Perfect searing and grilling require attention to detail. Here are some tried-and-true tips to elevate your cooking game:
- Use High Heat: High temperatures create the Maillard reaction, which gives food its golden-brown crust and rich flavor. Preheat the grill for at least 10 minutes to reach maximum heat.
- Avoid Overcrowding: Place food with enough space between pieces to allow heat to circulate evenly. Overcrowding can lead to steaming instead of grilling.
- Press Gently: When using the lid, apply gentle pressure to avoid squeezing out juices from meats or flattening sandwiches excessively.
- Oil the Surface: Lightly oil the grill plates to prevent sticking and enhance browning.
| Overall Rating | Number of Ratings | Total Reviews |
|---|---|---|
| 4.9 | 320 | 2878 |
Grill presses like the Winco Silicone Sleeve Press and Cuisinart CGPR-221 Cast Iron Grill Press are highly rated for their ability to maximize heat contact. These tools enhance browning and speed up cooking, making them ideal for achieving perfect searing and grilling results.
Pro Tip: Toast burger buns on the grill before assembling to prevent sogginess and add a delightful crunch.
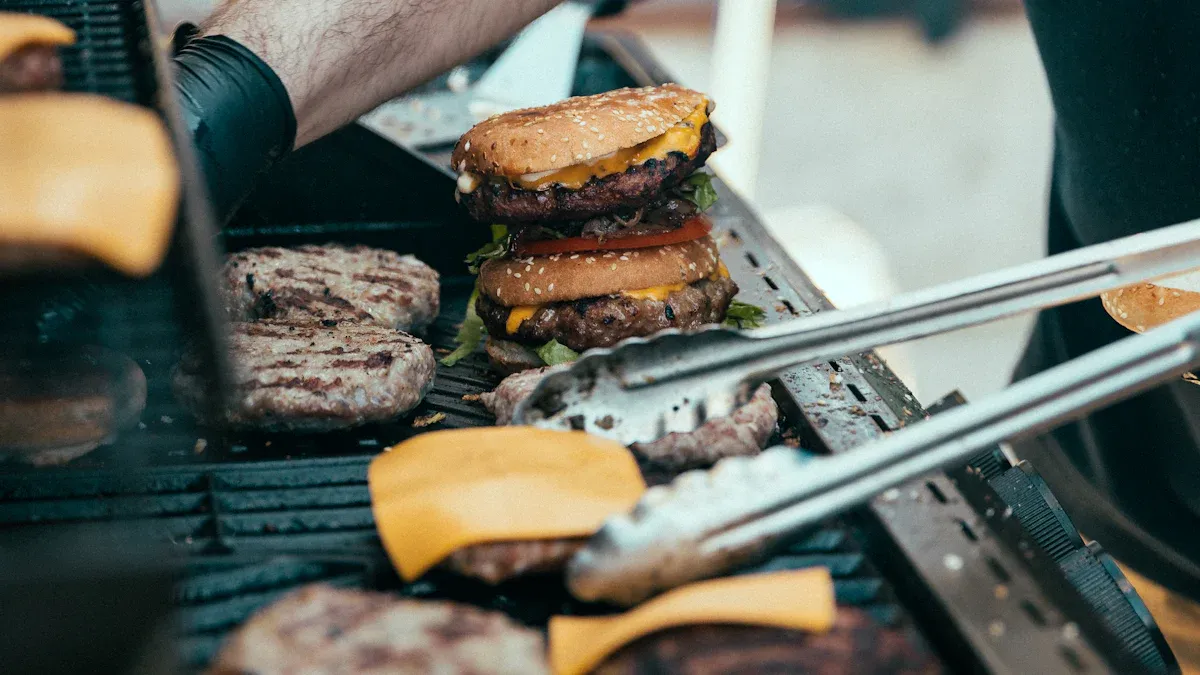
Creative Applications: Paninis, Smash Burgers, and More
A contact grill press isn’t just for grilling steaks or vegetables. Its versatility opens up a world of creative culinary possibilities.
- Paninis: Create gourmet sandwiches by layering meats, cheeses, and vegetables between slices of bread. Butter the outer sides and press gently for a crispy, golden crust.
- Smash Burgers: Use a heavy cast iron grill press for thicker patties or a lighter one for thinner burgers. Preheat the grill and add a bit of oil to prevent sticking. Smash the patties directly onto the hot surface for maximum caramelization.
- Grilled Desserts: Experiment with grilling fruits like peaches or pineapple slices. The heat caramelizes their natural sugars, creating a sweet and smoky treat.
- Breakfast Favorites: Cook bacon, eggs, or pancakes on flat griddle-style plates for a quick and easy breakfast.
Note: Always preheat the grill and use parchment paper or oil to prevent sticking when trying new recipes.
With a contact grill press, the possibilities are endless. Whether it’s a quick panini or a perfectly seared smash burger, this tool makes it easy to get creative in the kitchen.
Maintenance and Care
Cleaning After Use
Cleaning a contact grill press after each use keeps it in top shape and ensures consistent cooking results. Food residue left on the plates can affect performance and even alter the taste of future meals.
To clean effectively:
- Wipe While Warm: After unplugging the grill, let it cool slightly but keep it warm. Use a damp cloth or sponge to remove grease and crumbs.
- Tackle Stubborn Residue: For stuck-on bits, apply a mixture of warm water and mild dish soap. Scrub gently with a soft-bristle brush or non-abrasive scraper.
- Avoid Harsh Tools: Skip steel wool or abrasive cleaners. These can scratch the surface and damage non-stick coatings.
Tip: If the plates are removable, soak them in warm, soapy water for easier cleaning. Always dry them completely before reattaching.
Preventing Damage
Regular maintenance prevents costly repairs and keeps your grill press working like new. Small steps can make a big difference over time.
- Inspect Regularly: Check for loose screws, worn cords, or damaged plates. Fixing minor issues early avoids bigger problems later.
- Handle with Care: Avoid slamming the lid shut or pressing too hard on food. Excessive force can strain the hinge and warp the plates.
- Keep It Clean: Residue buildup can cause uneven heating and reduce efficiency. Cleaning after every use ensures optimal performance.
Why It Matters: Preventive maintenance helps identify and fix issues before they escalate. It also extends the lifespan of your grill press and reduces the risk of breakdowns.
Storage Best Practices
Proper storage keeps your contact grill press safe and ready for use. Following a few simple practices can prolong its performance and protect its components.
| Storage Practice | Explanation |
|---|---|
| Avoid stacking heavy items | Prevents damage to the plates and hinge from excessive pressure. |
| Store in a cool, dry spot | Protects the grill’s coating and electrical components from extreme temperatures and humidity. |
| Wrap the cord carefully | Reduces the risk of fraying or internal wire damage by avoiding tight winding of the cord. |
Pro Tip: If space is limited, store the grill vertically to save room while keeping it secure.
By cleaning, maintaining, and storing your contact grill press properly, you’ll enjoy professional-quality results for years to come.
A contact grill press transforms home cooking into a professional experience. It speeds up meal prep, delivers consistent results, and offers unmatched versatility. With the market for electric grills projected to grow at 7.1% annually, more people are embracing at-home cooking. Why not join them? Experiment with recipes and unlock your culinary creativity today!
FAQ
How do I know when my contact grill press is preheated?
Most models have an indicator light that turns on or changes color when preheating is complete. Refer to your user manual for specifics.
Can I use metal utensils on my contact grill press?
Avoid metal utensils. They can scratch non-stick surfaces. Use silicone, wooden, or heat-resistant plastic tools to protect the grill plates.
What foods work best on a contact grill press?
Grill meats, vegetables, sandwiches, and even fruits like pineapple. Its versatility makes it perfect for experimenting with different recipes.
Tip: Always lightly oil the plates to prevent sticking and enhance flavor.