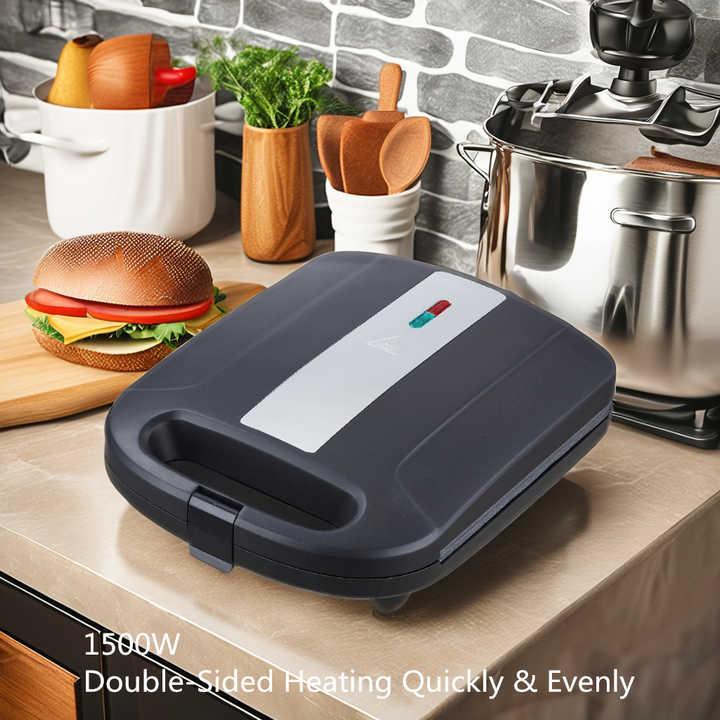
Many families face busy mornings. An Electric Sandwich Maker can help save several minutes at breakfast time. This appliance prepares a fresh sandwich in about five minutes, much faster than traditional methods. People enjoy quick, tasty meals without the hassle of multiple pans or extra steps.
Key Takeaways
- An electric sandwich maker saves time by cooking fresh, tasty sandwiches in about five minutes, making busy mornings easier and healthier.
- This appliance offers versatile options that let families customize ingredients, involve kids in cooking, and enjoy fun, creative breakfast meals.
- Using the sandwich maker ensures even cooking and easy cleanup, helping you make delicious sandwiches consistently with minimal effort.
Electric Sandwich Maker Benefits for Family Breakfasts

Fast and Convenient Mornings
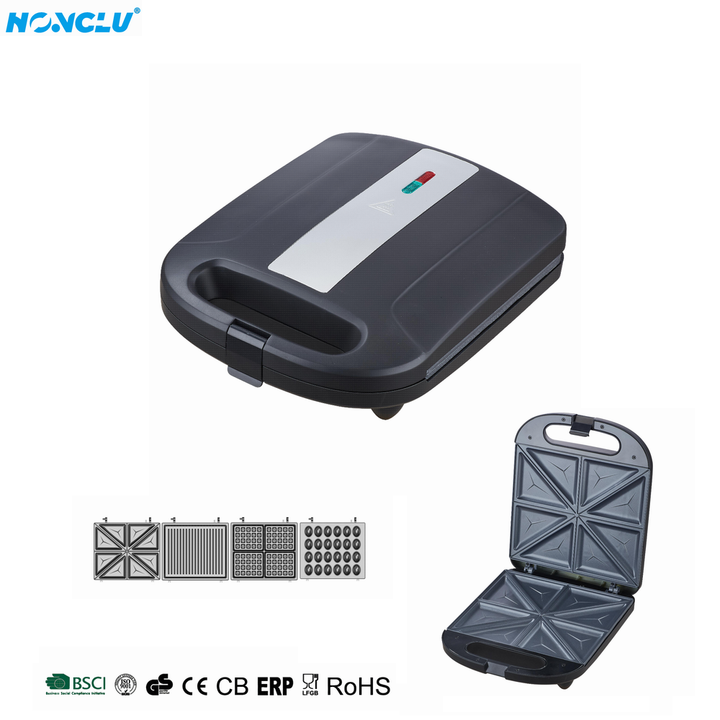
Families often need breakfast to be quick and easy. An Electric Sandwich Maker helps prepare a fresh sandwich in about five minutes. This device allows users to choose their own ingredients, making breakfast healthier and more personal. The sandwich maker cooks each layer of the sandwich at the same time, which saves effort and reduces the need for extra pans. Many models have indicator lights that show when the machine is ready or when the food is done. Cleanup is simple because many parts are dishwasher safe. These features help families avoid skipping breakfast or eating unhealthy fast food.
Tip: Preheat the sandwich maker while gathering ingredients to save even more time.
Versatile and Kid-Friendly Options
The Electric Sandwich Maker offers many choices for breakfast. Children can help pick ingredients and even join in the cooking process. This makes breakfast more fun and encourages kids to try new foods. The appliance can toast or grill sandwiches to a golden-brown finish, which many children enjoy. Creative layering of ingredients adds flavor and texture. Some families use cookie cutters to make fun shapes, making breakfast more exciting for kids. Serving sandwiches with dips can also add an interactive element.
| Category | Examples / Details |
|---|---|
| Bread Types | English muffins, bagels, croissants, waffles, pancakes |
| Sandwich Varieties | Smoked salmon croissants, sausage pancakes, avocado muffins |
| Kid-Friendly Ideas | Grilled cheese, nut butter & banana, veggie & hummus |
| Dietary Accommodations | Vegetarian, gluten-free, low-sugar options depending on ingredient choice |
Consistent, Tasty Results
The sandwich maker ensures every sandwich cooks evenly. Dual indicator lights and nonstick plates help prevent burning or undercooking. A lock-down lid and raised ridges seal in ingredients and keep the sandwich together. The floating lid design adjusts to different sandwich sizes, so both thin and thick sandwiches cook well. Many users enjoy the crispy bread and warm, gooey fillings. The appliance encourages creativity with flavors and ingredients, allowing families to make both simple and gourmet sandwiches. Adjustable temperature settings help achieve the perfect taste and texture every time.
How to Use an Electric Sandwich Maker: Step-by-Step Guide
Gather Ingredients and Tools
Before starting, everyone should gather all necessary ingredients and tools. This step helps the breakfast process go smoothly. The following items are essential for making breakfast sandwiches:
- Electric Sandwich Maker
- Bread or alternatives such as English muffins or tortillas
- Eggs
- Cheese (shredded cheddar or other types)
- Cooked meats (beef, chicken taco filling, ham, or leftovers like salsa chicken)
- Optional toppings: shredded lettuce, chopped tomatoes, salsa, guacamole, or sour cream
- Cooking spray to prevent sticking
- Plastic spatula for removing sandwiches
Tip: Prepare all fillings and toppings in advance to save time during assembly.
Preheat the Electric Sandwich Maker
Preheating the Electric Sandwich Maker is a key step. Most models require about 1 to 3 minutes to reach the right temperature. The indicator light usually signals when the appliance is ready. Preheating ensures even cooking and improves the texture and flavor of the sandwich. The bread becomes crisp, and the fillings heat evenly. During this time, users can prepare their workspace or finish assembling ingredients.
Assemble Your Breakfast Sandwich
Proper assembly leads to a better sandwich. The best results come from layering ingredients in a specific order. Start with the bread or muffin base. Add cooked eggs, cheese, and meat. Place any extra toppings, such as vegetables or sauces, on top. Avoid overfilling the sandwich. Too many ingredients can prevent even cooking and make the sandwich hard to handle.
Here are some popular ingredient combinations:
| Sandwich Style | Ingredients | Notes |
|---|---|---|
| Italian-inspired | Multigrain English muffin, basil pesto, mozzarella, egg or egg whites | Savory, with an Italian twist |
| Classic | English muffin, fresh egg, cheddar cheese, Canadian bacon | Traditional breakfast sandwich |
| Low-carb omelet-style | Scrambled eggs, bacon or sausage, bell peppers, cheese | No bread, fluffy omelet sandwich |
| Vegetarian/Vegan | Whole wheat muffin, vegan cheese, tomato, spinach, veggie bacon, tofu | Meatless, layered vegetables and vegan cheese |
| Sweet | Cinnamon raisin muffin, peanut butter, banana, honey | Warm, comforting, sweet breakfast option |
Note: Toasting the bread or muffin before assembly can improve texture and help ensure even cooking.
Place and Cook the Sandwich
After assembling, place the sandwich inside the preheated Electric Sandwich Maker. Close the lid gently. Most breakfast sandwiches cook in about 4 to 6 minutes. The bread toasts, cheese melts, and precooked meats heat through. For thicker sandwiches, a slightly longer cooking time may be needed. Avoid opening the lid too often, as this can interrupt the cooking process and affect the final result.
Tip: Use baking paper above and below the sandwich to keep the plates clean and make removal easier.
Remove, Serve, and Enjoy
Once the sandwich is golden and the cheese has melted, open the lid carefully. Use a plastic spatula to remove the sandwich. Serve immediately for the best taste and texture. The sandwich will be hot, so allow it to cool for a minute before eating. Enjoy the crispy bread and warm, flavorful fillings.
Cleaning the Electric Sandwich Maker
Cleaning the Electric Sandwich Maker after each use keeps it working well and ensures food safety. Wipe the plates with a damp cloth while the appliance is still warm. This step prevents food residue from hardening. For easier cleanup, use baking paper during cooking. Perform a deeper cleaning every few weeks, especially after making sandwiches with strong flavors or sticky ingredients. Always follow the manufacturer’s instructions. Never submerge the appliance in water. Dry thoroughly before storing in a cool, dry place.
Tip: Regular cleaning extends the life of the appliance and keeps every breakfast safe and delicious.
Tips and Breakfast Ideas with an Electric Sandwich Maker
Best Tips for Perfect Sandwiches
- Adjust cooking times to prevent over-toasting. Reducing the time can help avoid hard English muffins.
- Layer ingredients carefully. Placing cheese between bread and meat helps it melt evenly.
- Try different recipes. The Electric Sandwich Maker can make taco cups, stuffed French toast, mini pizzas, and even molten lava cake.
- Use removable rings to cut bread for a perfect fit.
- Apply a light coat of oil to the nonstick plates before each use. This step extends the life of the plates and improves sandwich quality.
- Choose a sandwich maker with interchangeable grill plates for more cooking options.
- Customize fillings and cooking techniques to match personal taste.
Tip: Place foil between sandwich layers to change the texture or make cleanup easier.
Common Mistakes to Avoid
- Avoid using abrasive cleaning tools. Soft-bristled toothbrushes or microfiber cloths protect the nonstick surface.
- Clean grates and crevices gently with mild detergent or baking soda.
- Do not soak the appliance. Clean while warm and dry thoroughly.
- Start with a cold pan and use low heat. This method prevents burning and ensures even melting.
- Select sturdy bread. Avoid bread with many holes or very soft slices.
- Butter the outside of the bread evenly for a crispy finish.
- Use cheeses that melt well, such as cheddar or Monterey Jack.
Easy Breakfast Sandwich Ideas
- Classic breakfast sandwich: English muffin, cooked bacon, American cheese, and a beaten egg.
- Veggie delight: Whole wheat bread, spinach, tomato, and mozzarella.
- Sweet treat: Cinnamon raisin bread, peanut butter, banana slices, and honey.
- Savory waffle sandwich: Waffles, sausage patty, and cheddar cheese.
- Mini pizza: Flatbread, marinara sauce, pepperoni, and mozzarella.
Many users find that experimenting with different breads, meats, and cheeses leads to new family favorites.
Families find breakfast easier and more enjoyable with these appliances.
- Many appreciate saving time and preparing several sandwiches at once.
- Easy cleaning and safety features help reduce stress.
- Versatile cooking options allow for healthy, customized meals.
Trying new breakfast ideas can make mornings fun and delicious for everyone.
FAQ
How does the HONGLU sandwich maker prevent food from sticking?
The non-stick coating on the plates helps food release easily. Users can wipe the plates clean with a damp cloth after each use.
Tip: A light spray of oil can help with extra-sticky ingredients.
Can children safely use the HONGLU sandwich maker?
The cool-touch exterior keeps hands safe. Adult supervision is always recommended for younger children during operation.
What types of meals can the HONGLU sandwich maker prepare?
This appliance makes sandwiches, paninis, waffles, and even donuts. The interchangeable plates allow families to try many breakfast and snack recipes.